
Mini Waffle Maker Instructions: A Comprehensive Guide (Updated 03/24/2026)
Welcome! This guide provides detailed instructions for using your mini waffle maker, ensuring delightful, perfectly cooked waffles every time. Mini waffles are trending!
Mini waffle makers have surged in popularity, becoming a beloved kitchen appliance for individuals and families alike. These compact devices offer a convenient and fun way to enjoy freshly made waffles without the bulk of a traditional waffle iron. Their smaller size makes them ideal for quick breakfasts, delightful snacks, or even single-serving desserts.
The recent “moment” for mini waffles, as noted online, highlights their growing appeal. They’re incredibly versatile, allowing for experimentation with various batters and toppings. From classic recipes to savory creations, the possibilities are endless. Their ease of use and quick cooking time make them a fantastic addition to any kitchen, especially for those seeking a simple and satisfying treat.
This guide will walk you through everything you need to know, from initial setup to creative recipe ideas, ensuring you get the most out of your mini waffle maker.
Why Choose a Mini Waffle Maker?
Convenience and speed are key benefits of opting for a mini waffle maker. Unlike larger models, they heat up quickly and cook waffles in just a few minutes, perfect for busy mornings or spontaneous cravings. Their compact size also means they take up minimal counter or storage space, a significant advantage for smaller kitchens.
The current trend, with “mini waffles having a moment,” demonstrates their growing appeal. They’re also incredibly versatile – ideal for single servings, portion control, or experimenting with different batter flavors. Plus, they’re fun! Creating mini waffles adds a playful element to breakfast or dessert.
Ultimately, a mini waffle maker offers a delightful and efficient way to enjoy a classic treat.
Types of Mini Waffle Makers Available
Mini waffle makers come in diverse designs to suit various needs. Single waffle makers produce one waffle at a time, ideal for individuals or small households. Double or multi waffle makers, however, offer increased capacity, perfect for families or entertaining. These expedite the cooking process significantly.
A crucial factor is the non-stick coating. Variations range from basic non-stick to more advanced ceramic or PTFE coatings. Higher-quality coatings ensure easy waffle release and simplified cleaning. Durability also differs; some coatings are more resistant to scratches and wear;
Considering these factors – capacity and coating quality – will help you select the best mini waffle maker for your lifestyle.
Single vs. Double/Multi Waffle Makers
Single mini waffle makers are compact and economical, excellent for individual portions or quick, small-batch cooking. They heat up rapidly and are easy to store, making them ideal for limited kitchen space. However, preparing waffles for multiple people can be time-consuming.
Double or multi waffle makers, conversely, offer increased efficiency. They cook several waffles simultaneously, significantly reducing preparation time for larger groups. While they occupy more counter space, the convenience they provide is substantial.
Choosing between these depends on your typical serving size and frequency of waffle making. Consider your needs!
Non-Stick Coating Variations
Non-stick coatings are crucial for easy waffle release and cleanup. Traditional PTFE (Teflon) coatings are widely used, offering excellent non-stick properties but requiring careful handling to avoid scratching. Ceramic coatings present a PTFE-free alternative, often marketed as more eco-friendly and healthier.
However, ceramic coatings may not be as durable as PTFE and can lose their non-stick effectiveness over time with heavy use. Reinforced coatings, combining PTFE with other materials, aim to enhance durability. Always use wooden or silicone utensils to protect the coating!
Consider your cooking habits when selecting a coating type.
Unboxing and Initial Setup
Carefully unpack your mini waffle maker, ensuring all components are present – the unit itself, the instruction manual, and potentially a recipe booklet. Inspect for any damage incurred during shipping. Before first use, remove all packaging materials, including any protective films or stickers.
Wipe down the exterior with a damp cloth. Familiarize yourself with the waffle maker’s parts: heating plates, indicator lights, and any control knobs. Ensure the unit is placed on a stable, heat-resistant surface away from flammable materials. Proper setup is key for safe operation!
Safety Precautions Before First Use
Always read the instruction manual thoroughly before operating your mini waffle maker. Never immerse the appliance in water or any other liquid. Ensure the power cord is undamaged and doesn’t contact hot surfaces. Keep children and pets away during operation due to high temperatures.
Do not operate the waffle maker if the cord or plug is damaged. Avoid touching hot surfaces; use handles or knobs. Unplug the appliance when not in use and before cleaning. Proper ventilation is crucial; do not cover the waffle maker during operation. Safety first!
Basic Mini Waffle Recipe
For classic mini waffles, you’ll need simple ingredients! Combine 1 cup of all-purpose flour, 2 teaspoons of baking powder, 1 tablespoon of sugar, and ¼ teaspoon of salt in a bowl. In a separate bowl, whisk together 1 egg, ¾ cup of milk, and 2 tablespoons of melted butter. Gently fold the wet ingredients into the dry ingredients until just combined – avoid overmixing!
A slightly lumpy batter is perfectly fine. This recipe yields delightfully fluffy mini waffles. Adjust sugar to your preference for sweetness. Experiment with vanilla extract for added flavor. Enjoy!
Ingredients for Classic Mini Waffles

To create the quintessential mini waffle experience, gather these essential ingredients. You will need 1 cup of all-purpose flour, providing the structural base. 2 teaspoons of baking powder are crucial for achieving a light and fluffy texture. 1 tablespoon of granulated sugar adds a touch of sweetness, adjustable to your liking. A pinch of ¼ teaspoon of salt enhances the flavors.

For the wet ingredients, you’ll require 1 large egg, binding everything together. ¾ cup of milk provides moisture, and 2 tablespoons of melted butter contribute richness and flavor. These simple components combine to form waffle perfection!
Step-by-Step Waffle Batter Preparation
Begin by whisking together the dry ingredients – flour, baking powder, sugar, and salt – in a large bowl. This ensures even distribution. In a separate bowl, combine the wet ingredients: egg, milk, and melted butter. Gently pour the wet ingredients into the dry ingredients.

Stir until just combined; avoid overmixing, as this can result in tough waffles. A few lumps are perfectly acceptable. Let the batter rest for 5-10 minutes to allow the gluten to relax, resulting in a lighter, fluffier waffle. Your batter is now ready for the mini waffle maker!
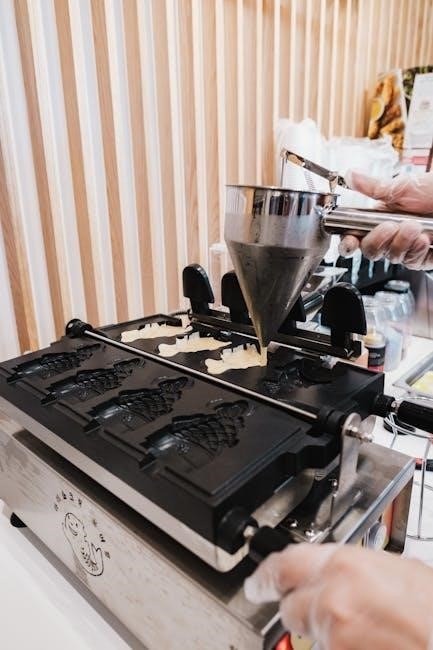
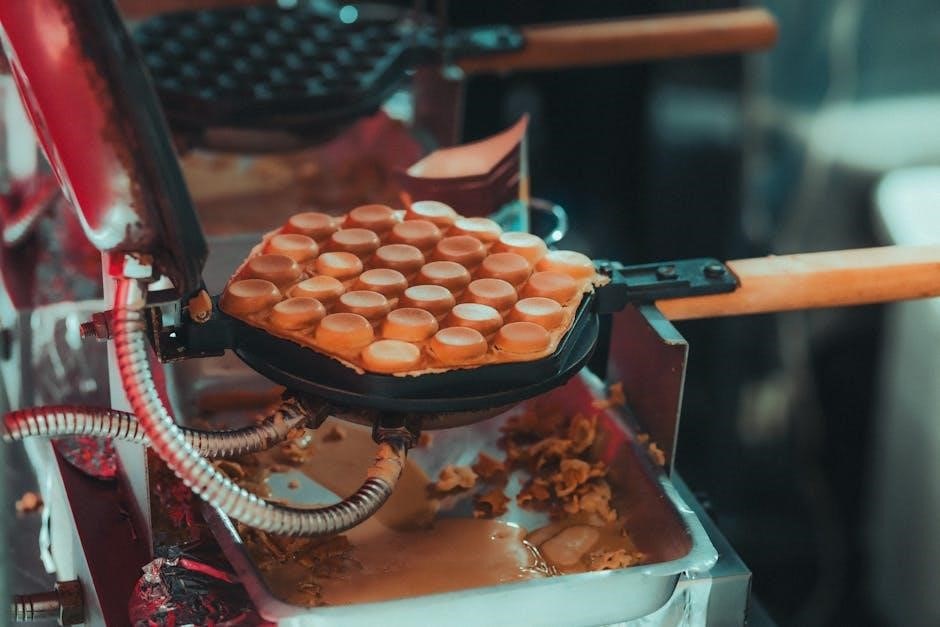
Operating Your Mini Waffle Maker: A Detailed Guide
Before you begin, ensure the waffle maker is placed on a stable, heat-resistant surface. Plug it into a grounded electrical outlet. The key to perfect waffles lies in proper preheating. Allow the waffle maker to heat up completely, usually indicated by a light or sound.
Once preheated, carefully open the waffle maker. Pour the batter onto the lower plate, using just enough to cover the surface without overflowing. Close the lid gently. Cooking time varies, but typically ranges from 3-5 minutes. Monitor closely for desired browning.
Preheating the Waffle Maker
Proper preheating is crucial for achieving golden-brown, crispy mini waffles. Most mini waffle makers feature an indicator light that signals when the optimal temperature is reached. Allow the appliance to heat up for approximately 3-5 minutes, or until the light changes color or turns off.
Avoid opening the lid during preheating, as this releases heat and prolongs the process. A fully preheated waffle maker ensures even cooking and prevents sticking. Patience is key! A well-heated surface creates that desirable texture and prevents a soggy waffle.
Pouring the Batter – Achieving the Right Amount
Determining the correct batter amount is essential for perfectly formed mini waffles. Overfilling can cause overflow and a messy cleanup, while underfilling results in thin, crispy waffles. Start with approximately 2-3 tablespoons of batter per waffle, adjusting based on your maker’s size and desired thickness.
Pour slowly and evenly onto the center of the preheated plate, allowing the batter to spread naturally. Avoid getting batter too close to the edges, as this can cause sticking. Experiment with small adjustments to find the sweet spot for your specific recipe and appliance.
Cooking Time and Temperature Control

Most mini waffle makers don’t have precise temperature controls, relying on a pre-set heating element. Cooking time typically ranges from 3-5 minutes per batch, but this varies depending on your model and desired crispness. Watch for visual cues – the waffle is ready when steam diminishes and the waffle appears golden brown.
Avoid lifting the lid prematurely, as this can cause the waffle to tear. Some makers have indicator lights signaling when preheating and cooking are complete. Experiment with slightly longer or shorter cooking times to achieve your preferred texture.
Achieving Perfectly Cooked Mini Waffles
Golden-brown perfection is within reach! Ensure your waffle maker is properly preheated for even cooking. Don’t overfill the plates; use just enough batter to cover the surface without overflowing. Resist the urge to open the lid mid-cycle, as this releases heat and can result in sticking.
A slight golden hue and diminished steam indicate readiness. If waffles are pale, extend cooking time slightly. For extra crispiness, consider a second, shorter cooking cycle. Experimentation is key to finding your ideal waffle – enjoy the process!
Cleaning and Maintenance
Proper cleaning extends your mini waffle maker’s lifespan. Always unplug and cool the appliance completely before cleaning. Avoid abrasive cleaners that can damage the non-stick coating. Gently wipe the plates with a soft, damp cloth or sponge after each use. For stubborn residue, a paste of baking soda and water works wonders.
Deep cleaning can be done periodically. Ensure no water enters the internal components. Regular maintenance prevents sticking and ensures optimal performance. A well-maintained waffle maker delivers consistently delicious results!
Cooling Down and Disconnecting
Safety first! Before attempting any cleaning or maintenance, allow your mini waffle maker to cool down completely. This prevents accidental burns and potential damage to the appliance. Never immerse the unit in water while it’s still hot.
Once cool, disconnect the power cord from the outlet. This is a crucial step to avoid electrical shock. Inspect the cord for any damage before storing. Proper cooling and disconnection are essential for safe and long-lasting use of your mini waffle maker.
Non-Stick Surface Cleaning Techniques
Gentle cleaning is key to preserving the non-stick coating; After cooling and disconnecting, use a soft cloth or sponge dampened with warm, soapy water. Avoid abrasive cleaners or scouring pads, as these can scratch and damage the surface. For stubborn residue, let soapy water sit briefly to loosen it.
Wipe gently in circular motions. Rinse with a clean, damp cloth and dry thoroughly. Never use metal utensils inside the waffle maker, as they will compromise the non-stick properties. Consistent, careful cleaning ensures optimal performance.
Deep Cleaning Procedures
Periodic deep cleaning maintains hygiene and extends your waffle maker’s life. Ensure the unit is completely cool and unplugged. For removable plates, wash them separately with warm, soapy water; avoid the dishwasher unless manufacturer instructions permit. For fixed plates, use a damp cloth with a mild detergent.
Pay attention to crevices where batter may accumulate. A soft brush can help. Never immerse the appliance body in water. Dry all components thoroughly before reassembly. A vinegar and water solution can tackle stubborn stains, but rinse completely afterward.
Troubleshooting Common Issues
Waffles sticking often indicate insufficient non-stick coating or inadequate preheating. Ensure proper preheating and consider a light spray of cooking oil. Uneven cooking can stem from uneven batter distribution or temperature fluctuations; adjust batter amount and check power outlet.
If the waffle maker isn’t heating, first verify the power cord connection and outlet functionality. Check for tripped circuit breakers. Avoid using damaged cords. If issues persist, consult the manufacturer’s support or consider replacement. Regular maintenance prevents many problems!
Waffles Sticking to the Plates
Persistent sticking usually points to an insufficient non-stick surface. Before first use, ensure the plates are thoroughly seasoned according to the manufacturer’s instructions. A light coating of cooking spray or oil before each batch is crucial, even with non-stick surfaces.
Avoid using metal utensils, as they can damage the coating. Gently lift waffles with a plastic or wooden utensil. Insufficient preheating also contributes to sticking; allow the waffle maker to reach optimal temperature. If sticking continues, a deeper clean might be needed to remove residue.
Unevenly Cooked Waffles
Inconsistent browning often stems from uneven batter distribution. Ensure you’re pouring the correct amount of batter – not too much, not too little – and spreading it evenly across the plates. Temperature fluctuations can also cause this; verify your waffle maker maintains a consistent heat.
Avoid opening the lid prematurely during the cooking process, as this releases heat. If your waffle maker has temperature control, experiment with slightly higher settings. Check the batter consistency; it shouldn’t be too thick or too thin for optimal, uniform cooking.
Waffle Maker Not Heating Up
A lack of power is the most common culprit. Double-check the power cord is securely plugged into both the waffle maker and a functioning outlet. Test the outlet with another appliance to confirm it’s delivering power. If the cord is damaged, do not use the waffle maker and consider a replacement.
Internal issues, like a blown fuse or a faulty heating element, may require professional repair. Some models have a reset button; consult your user manual. Ensure the unit has cooled down completely before attempting to restart it, as overheating protection might be activated.
Creative Mini Waffle Recipes
Beyond breakfast, mini waffles are incredibly versatile! Explore savory options like mini waffle pizzas topped with sauce, cheese, and pepperoni, or use them as a base for chicken and waffles sliders. Experiment with herbs and spices in your batter – rosemary, thyme, or even a pinch of chili powder can elevate the flavor.
Sweet creations abound! Drizzle with chocolate sauce, caramel, or maple syrup. Add fresh berries, whipped cream, or a scoop of ice cream; Consider a waffle sundae bar for a fun and interactive dessert experience. Mini waffles are perfect for portion control and delightful snacking!
Savory Mini Waffle Ideas
Transform your mini waffles into delightful savory treats! Imagine mini waffle pizzas, utilizing the waffle’s grid to hold sauce, cheese, and your favorite toppings – pepperoni, mushrooms, or olives. Chicken and waffles take on a new form as sliders, pairing crispy fried chicken with a mini waffle base and a drizzle of maple syrup.
Explore beyond the usual; create mini waffle sandwiches with ham and cheese, or use them as a unique base for eggs Benedict. Incorporate herbs like chives or dill into the batter for added flavor. Mini waffles offer a fun and unexpected twist to classic savory dishes!
Sweet Mini Waffle Topping Suggestions
Elevate your mini waffles with a symphony of sweet toppings! Classic choices like fresh berries – strawberries, blueberries, raspberries – paired with whipped cream are always a hit. Drizzle with chocolate sauce, caramel, or maple syrup for an extra indulgent treat. Consider a dusting of powdered sugar or a sprinkle of cinnamon.
Get creative with fruit compotes, Nutella, or peanut butter. Mini waffles also pair wonderfully with ice cream, creating a delightful mini waffle sundae. Don’t forget sprinkles, chopped nuts, or a dollop of yogurt for added texture and flavor. The possibilities are endless!
Storing Your Mini Waffle Maker
Proper storage is crucial for maintaining your mini waffle maker’s lifespan and ensuring it’s ready for your next waffle craving. Always allow the appliance to cool completely before storing. Clean the exterior with a damp cloth to remove any batter residue or crumbs.
Store the waffle maker in a cool, dry place, away from direct sunlight and moisture. If possible, store it in its original packaging to protect the non-stick coating. Avoid stacking heavy items on top of it, as this could cause damage. Secure the power cord to prevent tangling and accidental damage during storage.
Extending the Lifespan of Your Appliance

Consistent care significantly extends the life of your mini waffle maker. Avoid using metal utensils, as they can scratch and damage the non-stick coating. Opt for silicone or wooden tools instead. Regularly inspect the power cord for any signs of wear and tear, and discontinue use if damage is detected.
Proper cleaning after each use is paramount. Never immerse the appliance in water. Ensure the heating plates are completely dry before storing. By following these simple guidelines, you’ll enjoy countless batches of mini waffles for years to come, maximizing your investment!
Popular Mini Waffle Maker Brands & Models (Comparison)
Dash is a consistently popular brand, known for its affordable and colorful mini waffle makers, like the Dash Mini Waffle Maker. Cuisinart offers more premium options, prioritizing durability and even heating with models like the Cuisinart WAF-F20. Presto provides reliable, budget-friendly choices, such as the Presto 03510 Mini Waffle Maker.
Consider features like adjustable temperature controls and removable plates for easier cleaning. Read user reviews to gauge real-world performance and identify potential drawbacks. Ultimately, the “best” model depends on your budget and desired features, ensuring a satisfying waffle experience!
Where to Buy Mini Waffle Makers
Major retailers like Walmart and Target consistently stock a variety of mini waffle makers, both in-store and online, offering competitive pricing and frequent sales. Amazon provides an extensive selection, often with customer reviews to aid your decision. Department stores such as Macy’s and Kohl’s may carry higher-end models.
Directly from the manufacturer’s website (Dash, Cuisinart, Presto) can sometimes offer exclusive deals or colors. Check smaller appliance stores for specialized options. Comparing prices across different retailers is recommended to secure the best possible deal!
Mini Waffle Maker Accessories
Enhance your mini waffle experience with useful accessories! Silicone brushes are perfect for applying batter evenly and cleaning tight spaces. Mini tongs help safely remove waffles without scratching the non-stick surface. Spray bottles filled with cooking oil prevent sticking and promote golden-brown results.
Waffle picks add a fun touch for serving and eating. Heat-resistant mats protect your countertops. Interchangeable plates (if compatible with your model) allow for different shapes or designs. Consider a dedicated cleaning brush for thorough maintenance!
Recipe Variations for Dietary Needs (Gluten-Free, Vegan)
Adapting recipes for dietary needs is simple! For gluten-free waffles, substitute all-purpose flour with a gluten-free blend – rice flour, tapioca starch, and potato starch work well. Add a touch of xanthan gum for binding. Vegan waffles require replacing eggs with flax eggs (1 tbsp flaxseed meal + 3 tbsp water, let sit 5 minutes).
Use plant-based milk (almond, soy, or oat) instead of dairy. Ensure your baking powder is aluminum-free. Experiment with adding fruit purees or spices for extra flavor. These substitutions maintain the delightful mini waffle texture and taste, catering to diverse preferences!

Advanced Techniques: Waffle Art & Designs
Elevate your mini waffle game with creative designs! Utilize squeeze bottles for precise batter placement, creating shapes or lettering directly on the hot plate; Experiment with food coloring – add a few drops to separate batter portions for vibrant patterns. Consider using stencils, carefully placing them on the waffle maker before pouring batter.
For intricate designs, practice layering different colored batters. Don’t overfill; a thinner batter layer yields sharper details. Garnish with fresh fruit, chocolate sauce, or powdered sugar to enhance the visual appeal. Mini waffles are a perfect canvas for edible artistry!
Enjoying Your Mini Waffle Creations
Congratulations! You’re now equipped to master the art of mini waffle making. Embrace the versatility – from quick breakfasts to delightful desserts, these little waffles offer endless possibilities. Experiment with recipes, toppings, and presentation to discover your signature style.
Remember safety precautions and proper cleaning to ensure your waffle maker’s longevity. Share your creations with friends and family, spreading the joy of perfectly cooked, bite-sized waffles. Enjoy the convenience and fun of this trending kitchen appliance!